Sunday, 26 July 2020

Solar dyeing - a long overdue update...

Back in early June I started my first ever Solar Dye project. I just noticed that I never posted an update when the experiment was finished.

Anyway - I left the yarns in the jars with the rhododendron flowers for about four weeks. Weather in June was fairly unsteady (and has been like that throughout July, too), but we did see a couple of really sunny, warm days. 

Differences between the jars had become apparent quite early on, with the wool based yarns clearly taking on some colour, while the cotton yarn seemed to stay quite pale, although the water in the jar soon turned purple. 

One day before I ended the dye process, this is what the jars looked like (from left to right: wool, cotton, wool/silk/ramie):


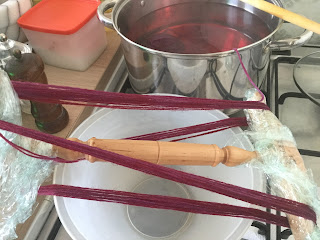
On the 29th of June, I released the yarn from the jars, rinsed it thoroughly, and hung it to dry (left to right: wool, wool / silk / ramie, cotton).


As expected, the cotton yarn had hardly taken on any colour - it looked a very pale green. The difference between the wool and the wool/silk/ramie blend was quite interesting to see - while the wool clearly favoured green and yellow tones, there seemed to be some purple in the mixed fibres yarn. I was curious to see what the end result would be after drying.

And here it is - as you can see, the cotton yarn hardly held any of the colour at all - I will overdye it with a more potent dye that sticks better to cotton:


The wool retained the greenish-yellow tones. I am really happy with the tonal variegation in this hank - it came out quite beautiful. 


The wool / silk / ramie yarn has become a beauty in its own right. While purple pretty much greyed out in drying, the silky sheen of the yarn gives the remaing tan and yellow tones an almost metallic look. Again - love the variegation!


So will there be more solar dyeing going on on my balcony this summer? Yes, definitely... in fact. there are three jars out there already! But more of this later...

Thursday, 23 July 2020

Yes... I do still knit...

... and it is still my go-to craft while sitting and watching TV (I can't just sit and watch... my hands need to do something...). I just tend to forget to write about it. This time, though... well, it just feels right to give it some space here, because it is really an update on my little black bean experiment.

I have knit a cowl from my bean dyed yarn, and I love it! The pattern is Gris de lin by Berangere Cailliau.


I'm almost a bit sad that it's summer now and well... generally a bit too warm to wear a cowl. I did put it on for a quick picture, though.


I've got just under half a cake (about 45 g) of yarn left over... I'm thinking matching wristwarmers...

Monday, 29 June 2020

Roselle Dyeing - Update

Right after my first attempt at dyeing with roselle flowers I said I wanted to try dye the same yarns again, but in reverse order, to get a considerably darker wool yarn, and a considerably lighter coloured wool / silk / ramie yarn...
Well, I used the same recipe again... and reversed the order in which I dyed the yarns. So this time - the 100 % wool went into the first dye bath, and then the blend.

And here are the results - a bit of a surprise again, but see for yourself - the pictures show the hanks from both attempts next to each other.

Wool:
The hank dyed in the first dye bath of the second attempt (top / left) did turn out darker - but not quite as dark as I had expected,


Wool / Silk / Ramie:
The hank that I dyed in the second bath of the second attempt (bottom / right) came out much darker than I had expected - but this time, it retained more of a red tinge after rinsing. It's a very pretty colour actually.


Third dye bath, anyone?
I mentioned that the book on plant dyes that I followed for the recipe said a second dye bath wasn't possible? Uhm... the liquid in the dye pot still looked very red after that second dye bath... so, hey! Why not try a third one... there's no harm in trying, right? 

I found a 100g braid of undyed Finnish woll top in my stash and divided it into 5 samples. Put them all in the dye pot (dye temperature around 70° C) and took one out every 20 minutes. I'm now looking forward to spinning up this subtle pink gradient:


Uhm... that last sample on the right is close to the colour I was expecting in the first place... being a fair match to the picture in the book.

Sunday, 28 June 2020

Ugh... but Mama - that yarn smells like old beans...

Ever since I read about dyeing yarn with black beans I knew I had to try it out. Not only was I keen to dye blue yarn - it also seemed to go very well with a certain love of Tex Mex cuisine my daughters have developed over the past couple of months... why not make a black bean dip from scratch next time? 

So I bought a bag of black beans, and basically followed these instructions on fibreartsy.com to make the bean dye. 

I set to work the day before chicken fajitas were on the family menu again... I put the beans in a big pot, added a fair amount of water, and let them soak for the next 24+ hours. Then I drained the remaining fluid into a large jar, making sure there were no solids left in the dye. The freshly drained fluid is not blue, by the way... it was more of a muddy purple with a hint of dark red. Unfortunately, I forgot to take a picture before I added the yarn to the jar (definitely have to do that next time) - and as soon as I added the yarn, a colour shift towards blue started to set in. By the time I had found my tablet, the colour had already changed considerably.


The yarn that I had picked out to dye was a fingering weight merino tweed yarn, which was a light grey to start with. The yarn was mordanted in a cold mordanting process using an aluminium formate based mordant. 

I left the yarn in the jar for just over a full day. The jar looked really promising...


... and my 7 yo daughter and I decided to take the yarn out of the jar. Her first reaction? "Ooh! Pretty!" Her second reaction... "Ugh... but Mama - that yarn smells like old beans!" Uhm - yes... it did... after all, it had been soaking in bean water for a day... a SUNNY day. Rinsing and a gentle wash with wool detergent took care of the smell, of course - and the end result after drying is a really pretty tonal blue yarn.


The black bean dip was really good, too, btw. I am already looking into more black bean recipes... this recipe for brownies has me intrigued...

Saturday, 13 June 2020

Surprise!

So... here's another chapter of "experiments with plant dyes and their surprising results". I'vementioned before that my girls have challenged me to dye pink yarn using plant dyes. So far, I have managed to dye a very light pink cotton cloth using a rose-lavender dye, and I still plan on using that recipe on cold mordanted cotton yarn soon enough... but for now... well...
I decided to try a different flower dye - I got my hands on a big bag of whole dried roselle (hibiscus sabdariffa) flowers (according to the label) - the stuff that is used to make hibiscus infusions. The dried flowers are a very dark red.


I was happy to find that one of my books on plant dyeing (Ebner/Hasenöhrl: Natürlich färben mit Pflanzen; also available in English: Natural Dyeing with Plants) has a recipe for dyeing wool or silk with roselle - recommends 200 % WoF dried flowers to produce a light pink colour on wool, or a more saturated dusty pink on silk.

The yarn that I chose to dye is a 100 g hank of a wool / silk / ramie (60 / 20 / 20) blend. I cold mordanted the yarn over the course of several days using an aluminium formate mordant. No cream of tartar was present in the mordant bath in the first place. I placed the mordanted yarn in a warm solution of cream of tartar for about an hour prior to dyeing - but wasn't sure whether this would have any effect.

Because I wanted to dye a 100g hank of yarn ,  I went with 200g of dried flowers. I soaked them for a good 8 hours, boiled them up in the evening, and let the dye cool down over night. In the morning I strained out the the plant matter and placed it in a fine mesh bag to be put back into the dye bath. Then I added the pre-mordanted yarn to the dye pot and slowly heated it up to just over 70°C. The yarn in the dyebath pretty much immediately seemed to take on a surprisingly dark red colour - oh well, I thought... guess most of the colour will disappear when I squeeze it out and rinse it.


I kept the dye at approx. that temperature for about half an hour, then let the yarn cool in the dye bath to just over 40 °C. I took it out and gave it a good squeeze. The yarn was still a dark red!


Rinsing did take out a lot of the red (probably because my last minute cream of tartar treatment did not really work), but I was left with a truly beautiful maroon colour (I think it's very close to actual rose wood)!


Now - my book says that a second dye from hibiscus doesn't really yield a decent result - but since the first dye came out so surprisingly dark, and the dye bath still looked quite saturated, I decided to just give it a try. I did still have a hank of 100% wool yarn in my cold mordanting bucket. I gave it a slightly modified cream of tartar treatment - heating it up to about 70 °C and letting it cool down again. So... did the second dye bath work? Well, it most certainly did! 


This was what I pulled out of the dye pot - bright pink! I unfortunately forgot to take a picture right after rinsing - again, some of the red washed out, but I must say the colour that stayed is much better - it's a beautiful dusty rose shade!

Here's a picture of the dried hanks:


Those colours look so beautiful together that I definitely have to repeat this experiment, this time to produce a 100 % wool hank in the darker shade, and a hank of the blend in the lighter shade. 

So, why exactly did I get that surprisingly dark shade? The truth is - I don't know! I guess I was lucky to find dried flowers that are produced in a way that retains the dye within the flowers particularly well. That's one of the things I have come to love about dyeing with plant material... it's full of surprises. 


Monday, 8 June 2020

Another experiment (in progress)... Solar Dyeing

Just over a week ago, I looked out of the kitchen window and saw... this:


The rhododendron in our back garden was in full bloom. What you can't really see here is the sole red rhododendron behind this wall of pinkish purple. I had planned to try out solar dyeing this year - so since the weather forecast looked fine for the next couple of days, I decided that now was the time.

I chose 1 hank of 100% wool yarn and one hank of 100% cotton yarn that had been cold mordanted over the past couple of days.

My guess was... extrapolating from what I have learned from earlier flower dye experiments (e.g. the roses last month)...  that the wool would again take on yellow hues... with a bit of luck, I might see something on the verge of green from the pink/purple flowers? But maybe I could get some faint pink or purple on cotton?

First step was picking flowers... lots of them - I picked 100 g of pink/purple and 100g of red for every 100g of yarn that I wanted to dye, which - on the first day, amounted to 400g of flowers over all. My daughters helped me, and I am pleased to say that the bees did not seem to be bothered too much. They minded their business, we minded ours - there were obviously enough flowers for everyone. Warning though: You'll end up with really sticky fingers.


Then I started to assemble my dye jars. It really was fun to layer the flowers and the yarn in the jars - starting with the red flowers, then yarn, more red flowers, yarn,... ,at one point mixing red and pink flowers, yarn, mixed flowers, yarn... pink flowers, yarn... ending with pink flowers. The jars were rather full when I was done...


Anyway - fill them to the brim with water, put them in the direct sunlight to heat them up... and wait what happens...


First thing that happened: I decided to fill a third jar the next day... this one with a wool / silk / ramie blend...
Second thing that happened: After just one day, I noticed the first colour changes.


There was definitely some green up in the pink/purple section... and there seemed to be a pinkish purple shimmer down in the red section - but it was too early to say which colours the yarns would pink up.

Third thing that happened: The weather changed. Towards the second half of the week heavy clouds appeared and decided to stay - they gave us some rain, which is of course good for the dye plants I'm trying to grow on our balcony - but what's worse: temperatures dropped below 20 °C... and have stayed there ever since. I am putting the jars into the direct sunlight whenever the sun decides to make an appearance (usually towards the evening)... but this project seems to have turned from a solar dyeing experiment to a low temperature dyeing experiment. Oh well... guess it'll just take a bit longer...
Here are my jars after one week - still looking promising enough:


Tuesday, 2 June 2020

(Almost) Instant Gratification

One weekend in May I was so annoyed after spending the better part of the day doing school related work that I needed a quick dye project to lift my spirits. So I got out some yellow Easter egg dye tablets and some orange and red KoolAid to dye a skein of yarn and a braid of fibre. Now yellow, orange and light red are usually not my colours, but
1. that is in fact the reason why I have a good collection of yellow and orange dye tablets by now.
2. the same is true for orange and light red KoolAid (it's not available where I live - but some awesome ravelers that I had the pleasure to exchange swap packages with have been so kind as to send me some in the past... the blues, greens and darker shades usually get used up fairly quickly).
3. I had a feeling that I should dye something fiery.

I started out by dyeing both yarn and fibre a light yellow using Easter egg dyes. Then I put the yarn into a casserole dish and sprinkled it randomly with orange, and red KoolAid. Wrapped it in oven proof plastic wrap and popped into the oven at 90°C for about an hour. 


The braid stayed in the dye pot, just covered with wather and I added dissolved KoolAid in certain spots.


I was quite happy with the yarn after rinsing and drying - and my 7 yo immediately fell in love, with it, too.


The fibre braid on the other hand seemed to be missing something. The yellow splotches didn't work for me, and the rest was too bright overall for my taste. 

So it went back into the dye pot, and I added some cyan coloured Easter egg dye here and there in an attempt to cover up the yellow and mute the overall brightness ... which to a certain degree dispersed throughout the dyebath. 


The result is simply stunning! It reminds me of verdigris on copper - I truly love it, and can't wait to spin it up (once my wheel is clear of an older project that has been lingering there for far too long).


Monday, 18 May 2020

Rediscovering Tie-Dyeing

Back in my teens I used to do quite a lot of tie-dyeing. I tie-dyed everything (using commercial dyes) - tote bags, silk scarfs... I even tie-dyed a dress that I had my aunt sew for me from plain white cotton (I did not have any sewing skills to speak of at the time) - oh, I loved that dress... I couldn't find any pictures of it, though (it was the early 1990s - before digital photography became accessible to everyone... when cameras were fed photographic film... and you thought twice before taking a picture...).

Now my recent experiments with plant dyes on cotton fabric are getting me back into the mood!

I dyed these two pieces of cotton cloth (each about 50 cm x 75 cm, approx. 110 g total) with a heather dye (100g heather simmered for about an hour, then strained).


The lighter coloured piece was tied right from the start and dyed in one step. The darker fabric was dyed in a two-step process - it was first dyed yellow in the same dye bath as the lighter piece of cloth. Then I tied it, added a little less than 1/2 tsp of iron(II) sulphate to the dye bath and put the fabric back in for a couple of minutes.

I'm really pleased with the result... there's a high probability of many a tie dyed project bag coming into existence in the near future...

Monday, 11 May 2020

The Quest for Pink...

I have two daughters - 3 and 7 years old - and both have an inexplicable love for amost all shades pink. So when I started dyeing again this year, one question came up pretty much right away: "Mum, can you also dye pink yarn with plants?". I said I'd look into it...

Avocado seems promising, and as I have mentioned before (when I managed to dye that pretty peach yarn), I will have to conduct extensive research on the subject... but that means eating lots of avocados first. So while I am saving up avocado pits and skins for the next couple of weeks - why not try some other plants that are said to produce pink dyes.

I found several accounts of a "rose, lavender, mint and lemon" dye that will give you pink. What I couldn't find was an actual dye recipe...

Time for an experiment.

Questions:

  • I know that rose petals alone should give me some kind of yellow on wool, no idea about the lavender... probably something with a green tinge?
  • The addition of lemon juice does make sense to me... lots of dyes are pH sensitive, so shifting the pH value in any direction can have surprising effects. But what difference will the mint make?

Supplies & Materials:

5 big(-ish) jars (with lids)
5 BFL fibre samples (à 20 g), pre-mordanted with alum (15% WoF)
5 cotton fabric samples (50 cm x 50 cm), pre-mordanted with alum (15% WoF)
5 tablespoons (preferably ones that you only use for dyeing)

100 g dried rose petals (mine were not the newest... I was just hoping they would work)
100 g dried lavender flowers
juice of 1 fresh lemon
10g fresh mint leaves

pH indicator strips
an oven

Preparing the dyes


Fill the jars with...

Jar 1: 40 g rose petals
Jar 2: 40 g lavender flowers
Jar 3: 20 g rose petals + 20 g lavender flowers
Jar 4: 20 g rose petals + 20 g lavender flowers + 4 tbsp lemon juice
Jar 5: 20 g rose petals + 20 g lavender flowers + 4 tbsp lemon juice + 10 g fresh mint leaves

then add hot water, stir and put the jars into the oven for a good hour at about 90°C.
Let the dye cool and strain the plant material from the dye baths.

Different colours of the dye baths should are apparent - the fluid in jars 1, 2 and 3 were different shades of reddish brown (jar 2 with a slight hint towards purple)...


jars 4 and 5 looked very definitely red, 5 leaning slightly towards orange.


The dyes in jars 1, 2 and 3 were almost pH neutral at 6,5. The dyes in jars 4 and 5 were acidic at pH around 4 due to the addition of the lemon juice.


Dye Process

I put one wool sample into each of the jars, and filled them up to make sure the wool is covered (see pictures above). Then I put them in the oven at around 90° for a couple of hours, and let them cool over night.

I did the same with the fabric samples the next day.

After taking the samples out of the dye bath I let them dry before rinsing.


Results

This experiment turned out to be a perfect example of how much the resulting colour depends on the fibre.

Here's how the dyes turned out on wool (jars 1 to 5 in order from left to right):


The results in all the jars that contained rose petals were shades of yellow. They are nice yellows, but nothing out of the ordinary, really. My daughter claims that she does see a very faint hint of pink in the samples dyed in jars 4 and 5 - I'd say the do lean towards a warmer yellow with a slight orange tinge. My suspicion that lavender on its own will yield a green tinge was confirmed. It's actually a very pleasant light green...

A lot more variety in colour can be found on the cotton samples (again, jars 1 to 5 in order from left to right):


You can see from the drying picture above - which was taken before rinsing, that quite a bit of colour did wash out in the rinsing process, but I was delighted to find that some colour did stay on!

Jars 1 and 3 gave me shades of light brown.

Lavender really was a pleasant surprise on cotton - yielding a truly beautiful light green tone.

And yes! We do see pink! Jar 4 (rose + lavender + lemon) yielded a very clear light pink tone, while the mint in jar 5 seemed to mute the pink a little bit toward a dustier shade with a slightly orange tinge.

And just for comparison - cotton and wool together:


Notes for future experiments
I am definitely interested in further rose dye experiments on cotton yarn and fabric. So here are some ideas:

  • I have read that mordanting with aluminum formate yields better dye results for plant dyes on cotton than mordanting with alum. Must try that...
  • I would have loved to have a 6th and 7th jar for rose + lemon and rose + lemon and mint, but I did not have enough rose petals for another two jars... will buy more rose petals...


Saturday, 25 April 2020

Peachy Avocado...

Reading about dyeing with avocados made me curious - so I saved up 6 avocado pits (ca. 140 g) to give it a try myself. I was curious to find where my yarn would end up in the range of colours from peach to dusty pink that I had read so much about.

But first of all... decisions... decisions... do I chop up the pits, or leave them intact. I had read both opinions (some going so far as to say you shouldn't even use damaged pits)... well, I went with chopping them up. Might be an interesting future experiment to do a direct comparison of both methods...


Anyway, I soaked the chopped up pits in water for a couple of hours, then fired up the dye pot. Sure enough, the water turned a really nice orange red. I let the dye cool down before straining it, putting the chopped pits into a net, then adding my pre-mordanted (12% alum; 5% cream of soda) yarn (100g) - a wool / silk / ramie blend - and the net containing the pit chips to the dye bath.


I used a thermometer and made sure to switch off the gas whenever the dye bath reached around 80 °C (so far, I am dyeing on our gas stove, and even on the lowest possible setting everything boils up like crazy after a while). When the temperature dropped below 70 °C I switched on the stove again. I held the temperature in this range for about an hour, then let yarn cothe cool down with the dye bath. I did not rinse immediately - hung the yarn outside to dry for a while first. Then rinsed, and hung it to dry completely.


The dye bath looked pretty much depleted after this, so I was going to pour it out the next morning… But guess what, when I came back in the morning, it looked darker again, so I decided to boil it up again… and yes, there seemed to be enough dye again to give it another try. So I put a 100 g skein of 100 % wool (mordanted the same way as the first skein) in after the dye bath had cooled down again a little. Heated it up a couple of times during the day, then let it cool down in the bath… and got another, slightly lighter, peach colour.


Here’s a picture of both skeins together for better comparison.


Have to start saving avocado pits again, and the peel, too. I read that they keep well in the freezer. 
Possible future experiments:
  • Try to extract the dye from the pits over the course of several days… see if I can get more saturated colours. 
  • Compare peel dye and pit dye.
  • Compare whole pit dye and chopped up pit dye.
  • Effects of dye bath pH on resulting colour.


Monday, 20 April 2020

What to do with those leftover Easter egg dyes...

So I dyed some eggs for Easter... because the kids wanted proper, colourful Easter eggs on the breakfast table to go with our "Hefezopf":


Those eggs did not take up all the dye, of course... so what do we do with leftover dye? Dye yarn of course! I found two balls of white sock yarn and decided I wanted to try a gradient dye.

Ingredients (assuming you did not just dye Easter eggs):

  • vinegar
  • 2 red Easter egg dye tablets
  • 2 blue Easter egg dye tablets
  • 2 balls of sock yarn à 50 g


Procedure:


  1.   Soak both skeins in warm water with a dash of vinegar for a while.
  2. Dissolve 1 red and 1 blue dye tablet in hot water with 4 tbsp vinegar. Pour the dye into the dye pot and add enough water to cover the wool.Dye both skeins a light purple.
  3. Let the yarn dry enough not to cause to much of a mess in the livingroom when you roll the two strands into one ball.


  4. Make a new dye bath using one red tablet. Put the ball of yarn in, making sure it is completely covered, start heating up the dye bath. When the outer layer does not seem to take up any more dye, start to wind the yarn onto a kniddy-knoddy VERY  SLOWLY. Caution! Hot! Go on until either all dye is depleted or you think you've got enough red-ish purple yarn on the kniddy-knoddy.

  5. Wind the rest of the ball onto the kniddy-knoddy. Do this in a place where splashing water doesn't matter all that much... 

  6. repeat step 3. Make sure you start at the red end.
  7. Repeat steps 4 and 5 with a blue dye tablet. 
  8. Let the yarn dry.
  9. Separate the strands by winding them into two balls. Do this with no children around, because there's bound to be plenty of adult language involved.
  10. (optional) Re-wind the balls into skeins or cakes to make them even more pleasing to the eye.

I just LOVE the result. Yes, seperating the two strands in the end was tedious... but I think it was totally worth the effort! Now I'm trying to decide what to make from these - leaning towards shawl...


Sunday, 19 April 2020

Starting into the dyeing season

Ha! I've been quiet for far too long... again!

I know... is there really such a thing as a dyeing season? Can't I just dye in the winter, too? Well, I suppose I could... I just hardly ever do. Truth is, I like to keep the door to the balcony open while heating up the dye bath, especially when I'm using plant dyes - can get uncomfortably cold in the winter. Also, I like to dry my dyed yarn / wool braids / fabrics out on the balcony... takes ages in winter...

BUT, now it's spring again - and last week was Easter... which always makes me want to dye. I had been saving onion skins for months... ended up with a good 120g! So, onion skin dyeing it was...

I picked out a braid of mystery wool - I don't have the faintest idea what it is exactly... came with a drop spindle set - and some cotton fabric. Later, when it was clear that there would be plenty of dye left after the first dye bath I prepared three skeins of wool yarn for a second and third dye bath.

I mordanted everything with 12 % WoF alum and 5 % WoF cream of tartar.

And here's the result of a weekend of dyeing with onion skins:


The coppery orange braid on the right and the wonderfully yellow cotton fabric are from the first dye bath. I scrunched up the cotton cloth and tied it into a ball, which gave it a slight tie dye look. The light orange skein on the right is from the second bath, the two yellow skeins in the middle and on the left are both from the third dye bath - the colour of the middle skein was slightly modified towards a slightly orange tinge with a teaspoon of potassium carbonate.

And another picture of the skeins - in reverse order:


 So, yup - dyeing with onion skins is definitely lots of fun - I was surprised by the range of colours (from a deep coppery orange to a sunny yellow) I got from this one pot of dye. Surely something that I will try again... already started to save more onion skins...