Saturday, 25 April 2020

Peachy Avocado...

Reading about dyeing with avocados made me curious - so I saved up 6 avocado pits (ca. 140 g) to give it a try myself. I was curious to find where my yarn would end up in the range of colours from peach to dusty pink that I had read so much about.

But first of all... decisions... decisions... do I chop up the pits, or leave them intact. I had read both opinions (some going so far as to say you shouldn't even use damaged pits)... well, I went with chopping them up. Might be an interesting future experiment to do a direct comparison of both methods...


Anyway, I soaked the chopped up pits in water for a couple of hours, then fired up the dye pot. Sure enough, the water turned a really nice orange red. I let the dye cool down before straining it, putting the chopped pits into a net, then adding my pre-mordanted (12% alum; 5% cream of soda) yarn (100g) - a wool / silk / ramie blend - and the net containing the pit chips to the dye bath.


I used a thermometer and made sure to switch off the gas whenever the dye bath reached around 80 °C (so far, I am dyeing on our gas stove, and even on the lowest possible setting everything boils up like crazy after a while). When the temperature dropped below 70 °C I switched on the stove again. I held the temperature in this range for about an hour, then let yarn cothe cool down with the dye bath. I did not rinse immediately - hung the yarn outside to dry for a while first. Then rinsed, and hung it to dry completely.


The dye bath looked pretty much depleted after this, so I was going to pour it out the next morning… But guess what, when I came back in the morning, it looked darker again, so I decided to boil it up again… and yes, there seemed to be enough dye again to give it another try. So I put a 100 g skein of 100 % wool (mordanted the same way as the first skein) in after the dye bath had cooled down again a little. Heated it up a couple of times during the day, then let it cool down in the bath… and got another, slightly lighter, peach colour.


Here’s a picture of both skeins together for better comparison.


Have to start saving avocado pits again, and the peel, too. I read that they keep well in the freezer. 
Possible future experiments:
  • Try to extract the dye from the pits over the course of several days… see if I can get more saturated colours. 
  • Compare peel dye and pit dye.
  • Compare whole pit dye and chopped up pit dye.
  • Effects of dye bath pH on resulting colour.


Monday, 20 April 2020

What to do with those leftover Easter egg dyes...

So I dyed some eggs for Easter... because the kids wanted proper, colourful Easter eggs on the breakfast table to go with our "Hefezopf":


Those eggs did not take up all the dye, of course... so what do we do with leftover dye? Dye yarn of course! I found two balls of white sock yarn and decided I wanted to try a gradient dye.

Ingredients (assuming you did not just dye Easter eggs):

  • vinegar
  • 2 red Easter egg dye tablets
  • 2 blue Easter egg dye tablets
  • 2 balls of sock yarn à 50 g


Procedure:


  1.   Soak both skeins in warm water with a dash of vinegar for a while.
  2. Dissolve 1 red and 1 blue dye tablet in hot water with 4 tbsp vinegar. Pour the dye into the dye pot and add enough water to cover the wool.Dye both skeins a light purple.
  3. Let the yarn dry enough not to cause to much of a mess in the livingroom when you roll the two strands into one ball.


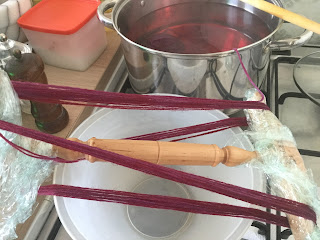
  4. Make a new dye bath using one red tablet. Put the ball of yarn in, making sure it is completely covered, start heating up the dye bath. When the outer layer does not seem to take up any more dye, start to wind the yarn onto a kniddy-knoddy VERY  SLOWLY. Caution! Hot! Go on until either all dye is depleted or you think you've got enough red-ish purple yarn on the kniddy-knoddy.

  5. Wind the rest of the ball onto the kniddy-knoddy. Do this in a place where splashing water doesn't matter all that much... 

  6. repeat step 3. Make sure you start at the red end.
  7. Repeat steps 4 and 5 with a blue dye tablet. 
  8. Let the yarn dry.
  9. Separate the strands by winding them into two balls. Do this with no children around, because there's bound to be plenty of adult language involved.
  10. (optional) Re-wind the balls into skeins or cakes to make them even more pleasing to the eye.

I just LOVE the result. Yes, seperating the two strands in the end was tedious... but I think it was totally worth the effort! Now I'm trying to decide what to make from these - leaning towards shawl...


Sunday, 19 April 2020

Starting into the dyeing season

Ha! I've been quiet for far too long... again!

I know... is there really such a thing as a dyeing season? Can't I just dye in the winter, too? Well, I suppose I could... I just hardly ever do. Truth is, I like to keep the door to the balcony open while heating up the dye bath, especially when I'm using plant dyes - can get uncomfortably cold in the winter. Also, I like to dry my dyed yarn / wool braids / fabrics out on the balcony... takes ages in winter...

BUT, now it's spring again - and last week was Easter... which always makes me want to dye. I had been saving onion skins for months... ended up with a good 120g! So, onion skin dyeing it was...

I picked out a braid of mystery wool - I don't have the faintest idea what it is exactly... came with a drop spindle set - and some cotton fabric. Later, when it was clear that there would be plenty of dye left after the first dye bath I prepared three skeins of wool yarn for a second and third dye bath.

I mordanted everything with 12 % WoF alum and 5 % WoF cream of tartar.

And here's the result of a weekend of dyeing with onion skins:


The coppery orange braid on the right and the wonderfully yellow cotton fabric are from the first dye bath. I scrunched up the cotton cloth and tied it into a ball, which gave it a slight tie dye look. The light orange skein on the right is from the second bath, the two yellow skeins in the middle and on the left are both from the third dye bath - the colour of the middle skein was slightly modified towards a slightly orange tinge with a teaspoon of potassium carbonate.

And another picture of the skeins - in reverse order:


 So, yup - dyeing with onion skins is definitely lots of fun - I was surprised by the range of colours (from a deep coppery orange to a sunny yellow) I got from this one pot of dye. Surely something that I will try again... already started to save more onion skins...