In kindergarten they just cut them out of cardstock and staple the ends together. According to my daughter, they never really fit and are uncomfortable to wear - plus, sometimes hair gets caught in the staples (even though they make sure the "bad ends" are on the outside). Could I make her one that's more comfortable and better fitting... well, challenge accepted.
This is what I came up with:
Materials I used:
- corrugated cardstock (min. 7 inch x 5 1/4 inch)
- adhesive plastic rhinestones, stickers, etc. for decorating
- 10 inch x 2 inch piece of scrap fabric
- 6 1/2 inch piece of elastic
- sewing thread
- crochet thread
- sewing machine
- needle
To avoid the feeling of the crown sticking to the forehead and make it more comfortable to wear, glue some cotton bias tape to the bottom edge on the inside of the crown after cutting it out.
Gather supplies to decorate the crown.
My daughter loves sparkly, glittery things, so I went with lots of adhesive plastic rhinestones - white and turquoise for the most part, because she wanted a Frozen themed party.
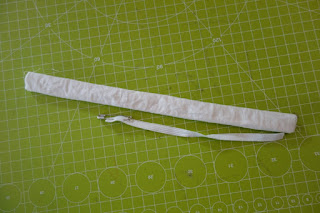
Cut a 10 inch x 2 inch rectangle of fabric and a 6 1/2 inch piece of elastic for the strap.
Fold the fabric rectangle lengthwise (wrong side out) and sew along the long edge. Then turn it right side out.
Attach a safety pin to the elastic and thread it through the fabric tube. Pin the ends of the elastic to the ends of the tube and sew them shut.
Last step! Hand stitch the elastic strap to the ends of the cardstock crown with just a couple of stitches (I used crochet thread):
And done!


No comments:
Post a Comment